

# Deploy a Flow
Now that your environment is set up, it's time to deploy your flow.
# Creating a Project
Before we can register a flow with the Prefect backend, we first need to create a Project. Similar to a directory in a filesystem, Prefect organizes flows into projects, where each flow belongs to exactly one project.
Projects can be created using the UI through either the project filter on the dashboard page, or in the project settings page.
Here we'll create a new project called "tutorial".
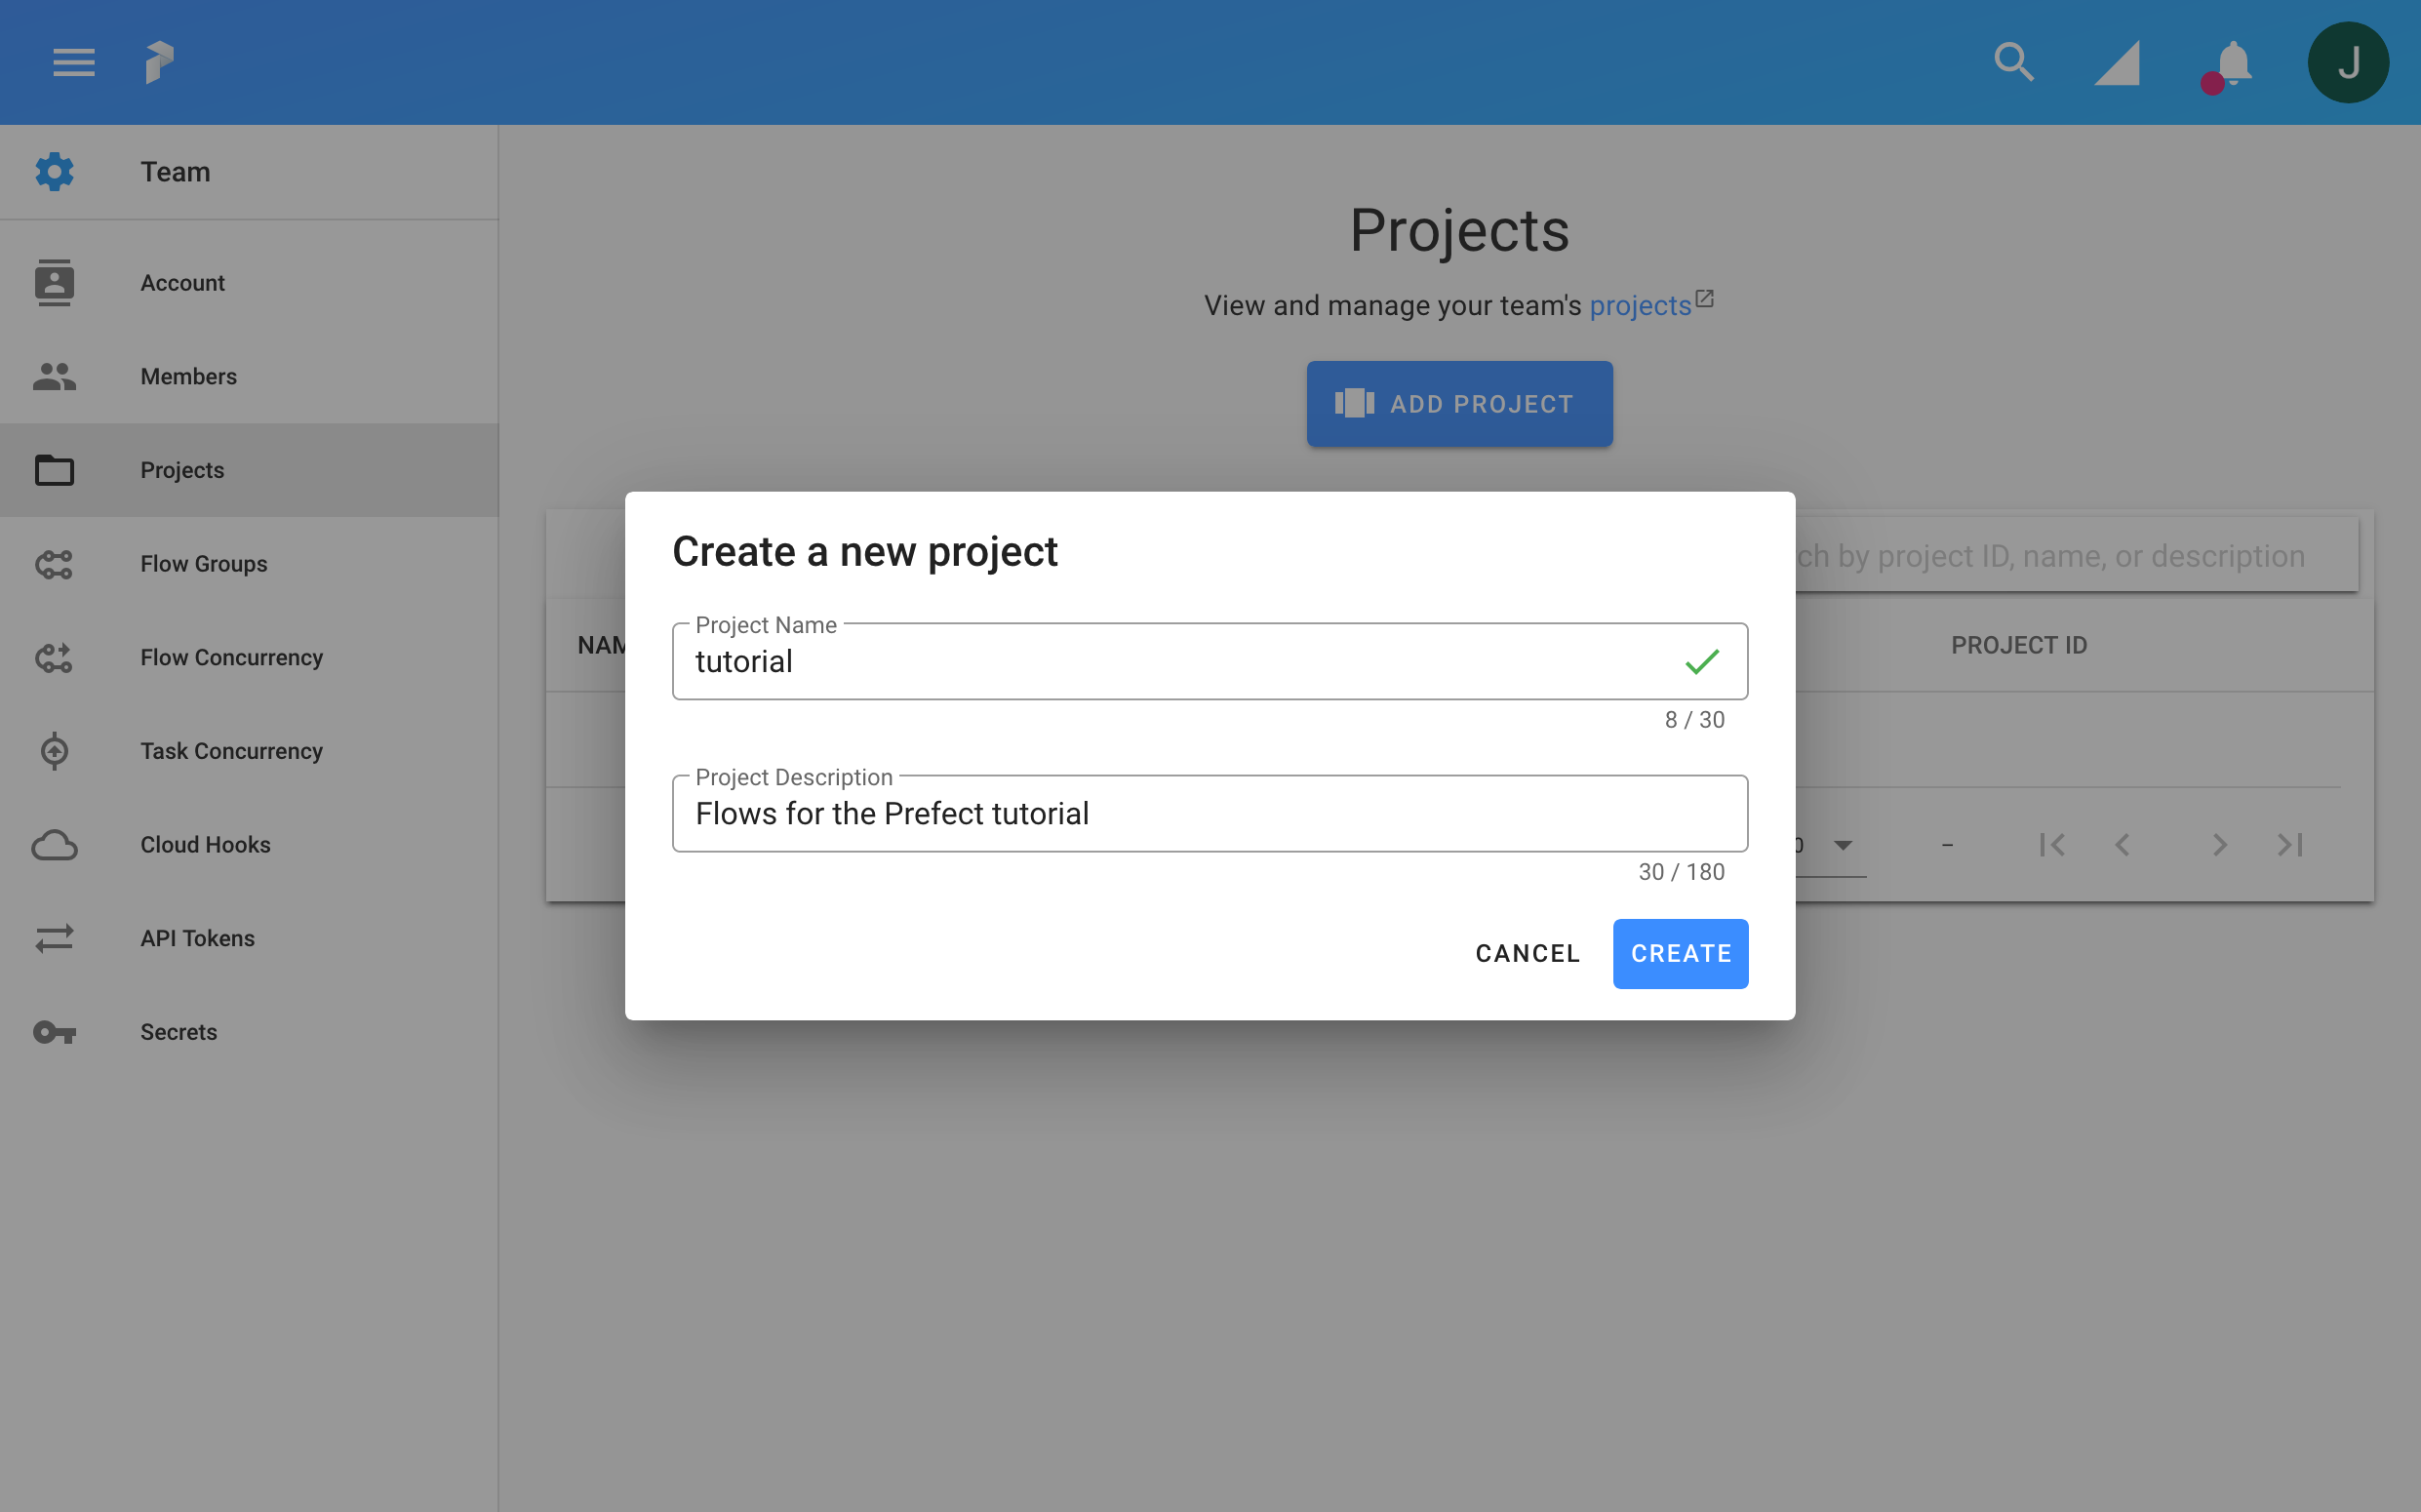
Alternatively you can use the Prefect CLI:
$ prefect create project "tutorial"
For more information, see the projects documentation.
# Register a Flow
In order for your flow to be managed by a Prefect backend (either Prefect Cloud or Prefect Core server) it must first be registered.
The easiest way to register a created flow is to call flow.register with the
name of the project you wish to register it under.
Here's the example flow we're using (updated to now say "Hello, Cloud!"):
import prefect
from prefect import task, Flow

@task
def say_hello():
    logger = prefect.context.get("logger")
    logger.info("Hello, Cloud!")

with Flow("hello-flow") as flow:
    say_hello()

# Register the flow under the "tutorial" project
flow.register(project_name="tutorial")
When a flow is registered, the following steps happen:
- The flow is validated to catch common errors.
- The flow's source is serialized and stored in the flow's Storage on your infrastructure. What this entails depends on the type of Storage used. Examples include building a Docker image, saving the code to an S3 bucket, or referencing a GitHub repository.
- The flow's metadata is packaged up and sent to the Prefect backend.
Note that the the Prefect backend only receives the flow metadata (name, structure, and so on) and not the actual source for the flow. Your flow code itself remains safe and secure on your infrastructure.
For more information on flow registration, see the registration docs.
Assuming you saved the code shown above to a file called hello_flow.py (or edited the file created in a previous step), running it in a terminal session should output some details about your flow:
$ python hello_flow.py
Result check: OK
Flow URL: https://cloud.prefect.io/dev-prefectio/flow/fc5e630d-9154-489d-98d4-ea6ffabb9ca0
 └── ID: 90f9f57b-bff6-4d34-85be-8696d9982306
 └── Project: tutorial
 └── Labels: ['LABEL']
After registering your flow, you should see it in the UI on the tutorial project Prefect Cloud dashboard. Clicking on the flow will bring you to the Flow page. You can navigate to the Flow URL directly as well.
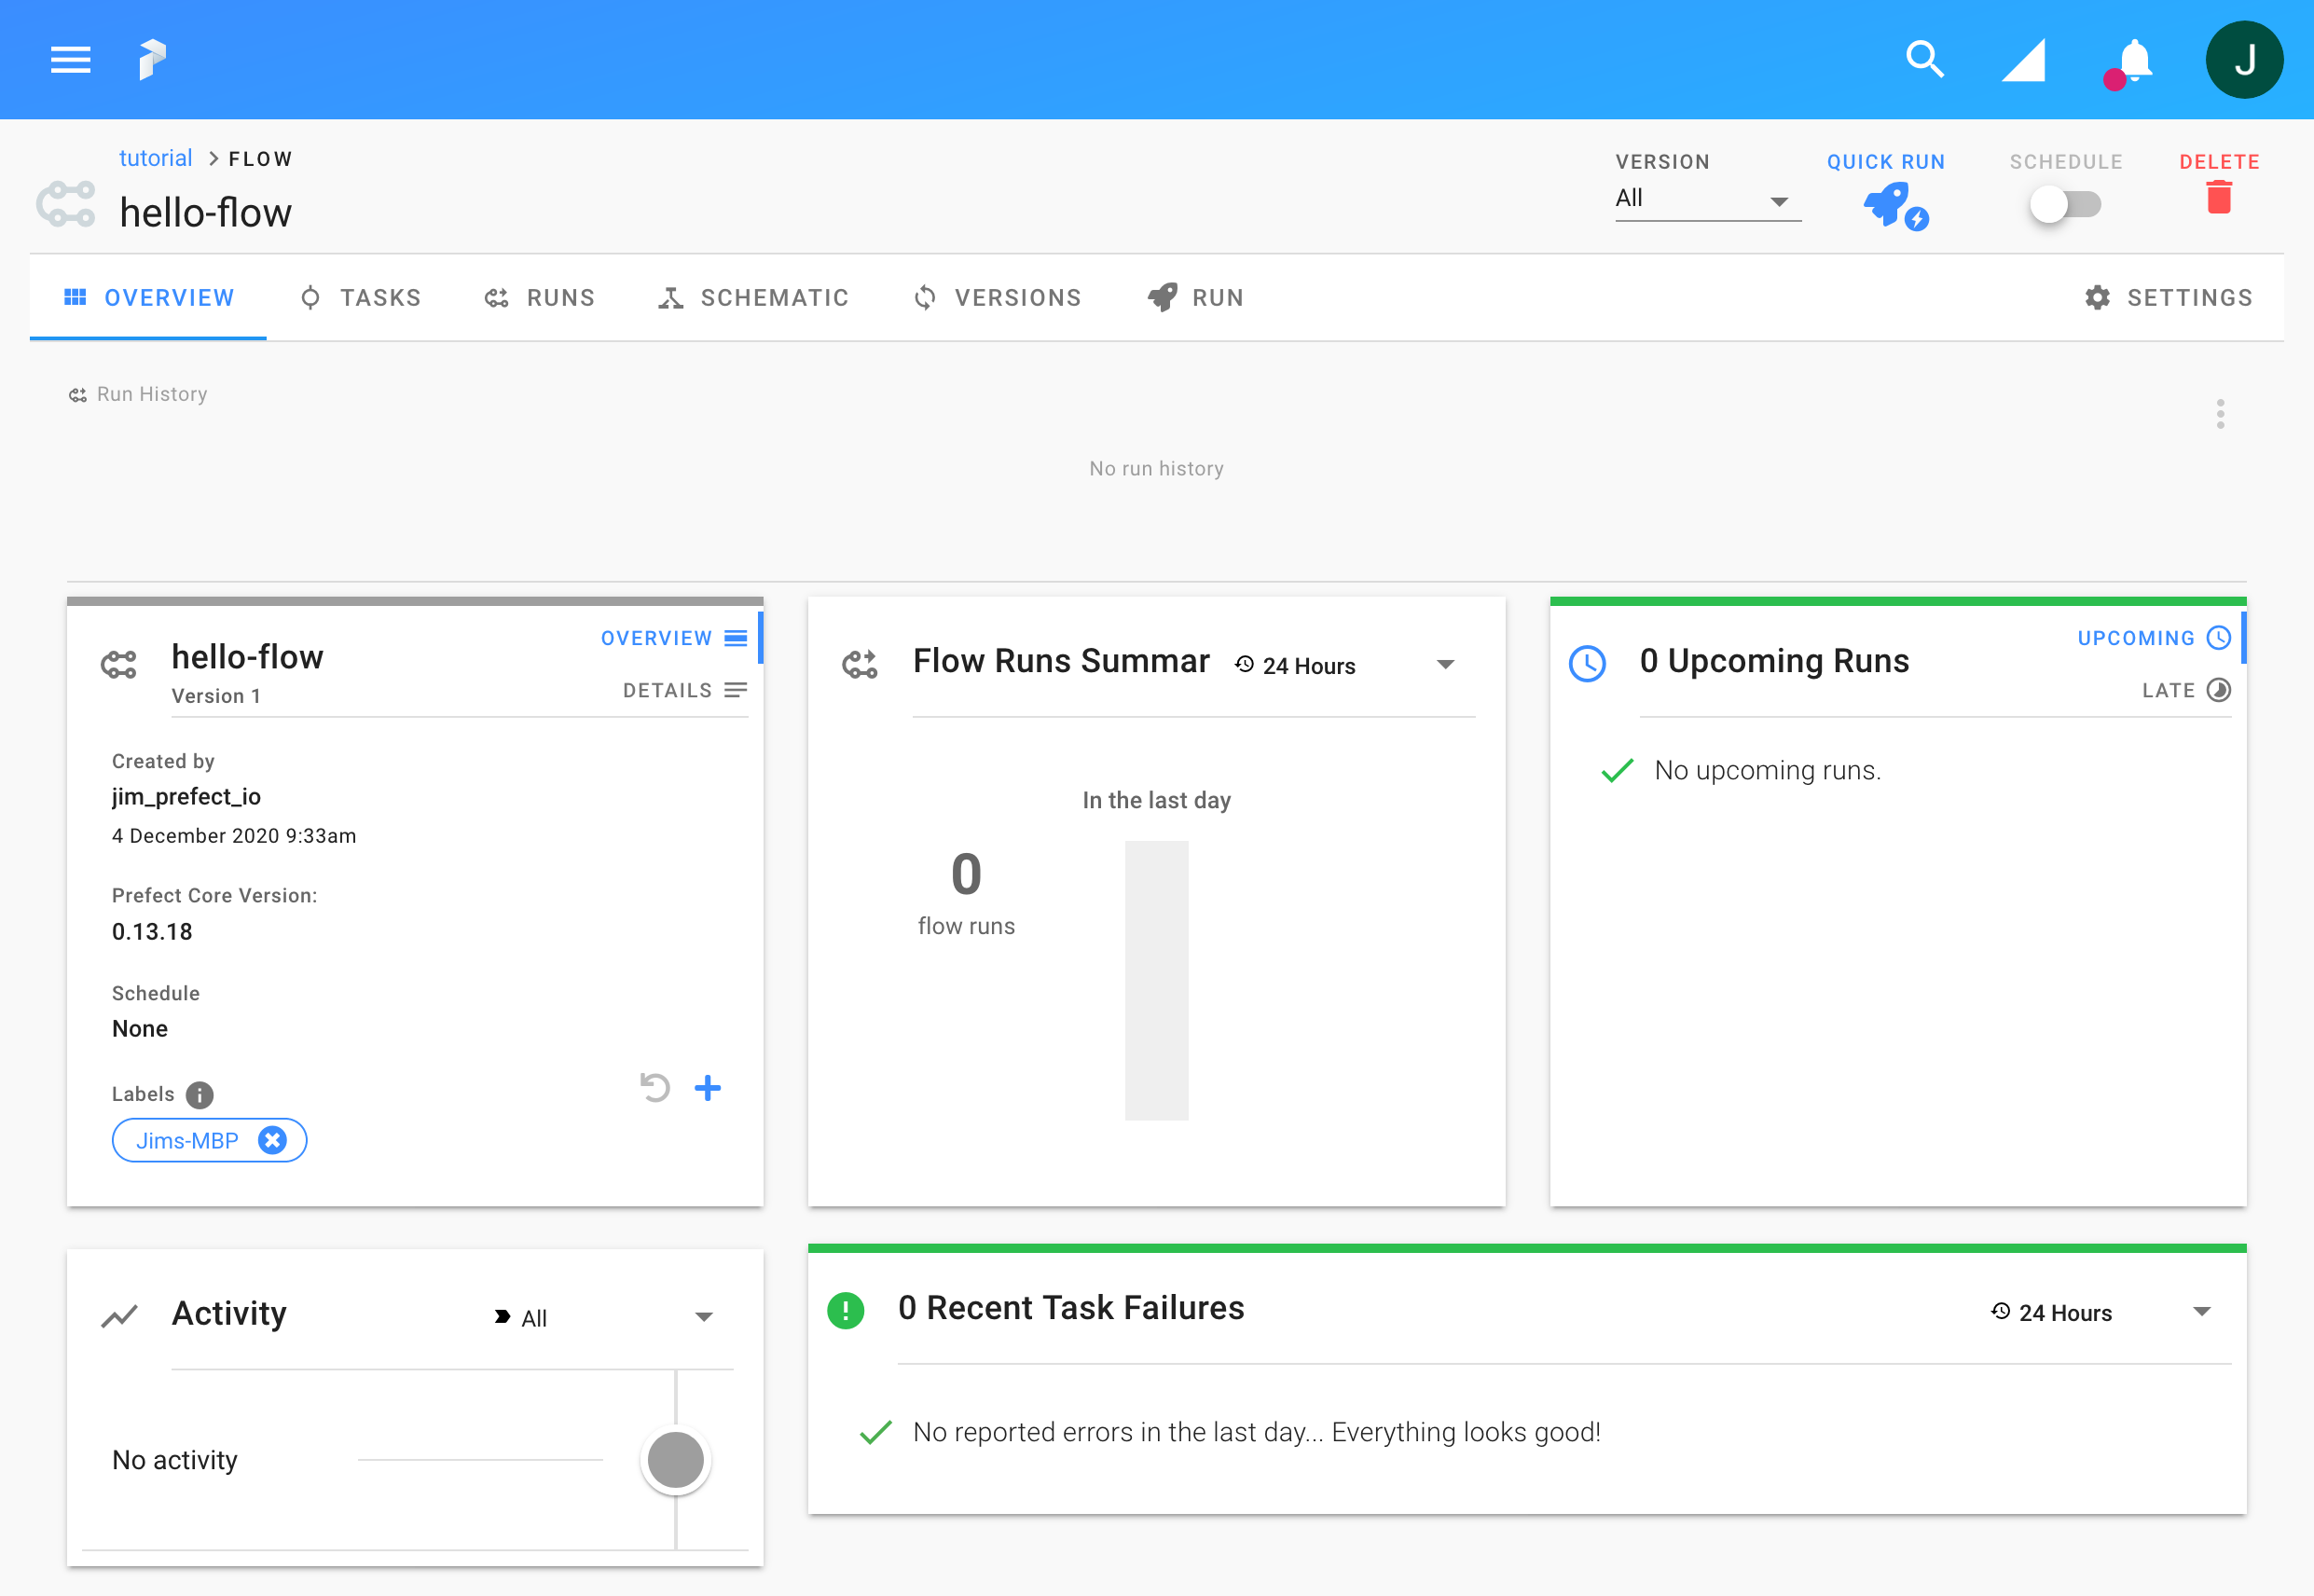
Your flow registered successfully!
Labels
You may have noticed that both your registered flow and your local agent have labels associated with them. Specifically, your flow had a single label set to the hostname of your local machine (for example, "Janes-MacBook.local").
This hostname label ensures that only local agents started on this machine can execute your registered flow. Without labels, your flow might get picked up by other agents running in your infrastructure, or your locally running agent would attempt to execute other flows — potentially even flows that it can't access!
Labels are a powerful feature of Prefect Cloud, providing fine control over exactly what flows your agents can execute.
# Start an Agent
You're almost ready to start scheduling flow runs using Prefect Cloud. The last thing you need to do is start a Prefect Agent. Agents watch for any scheduled flow runs and execute them accordingly on your infrastructure.
Prefect has many different kinds of Agents for deploying on different platforms (such as Kubernetes, ECS, and Docker).
Here we'll start a Local Agent for deploying flows locally on a single machine.
In a new terminal session, run the following to start a local Agent.
$ prefect agent local start
This should output some initial logs, then sit idle waiting for scheduled flow runs.
If you need to shutdown the Agent at any point, you can stop it with a
Ctrl-C. For now, you'll want to leave it running for the rest of the
tutorial.
# Execute a Flow Run
You're now ready to execute your first flow run!
Flow runs can be created in a few different ways. Running a flow from Prefect Cloud is an easy way to control flow runs. Even non-engineering users can run and monitor flows from the Prefect Cloud UI.
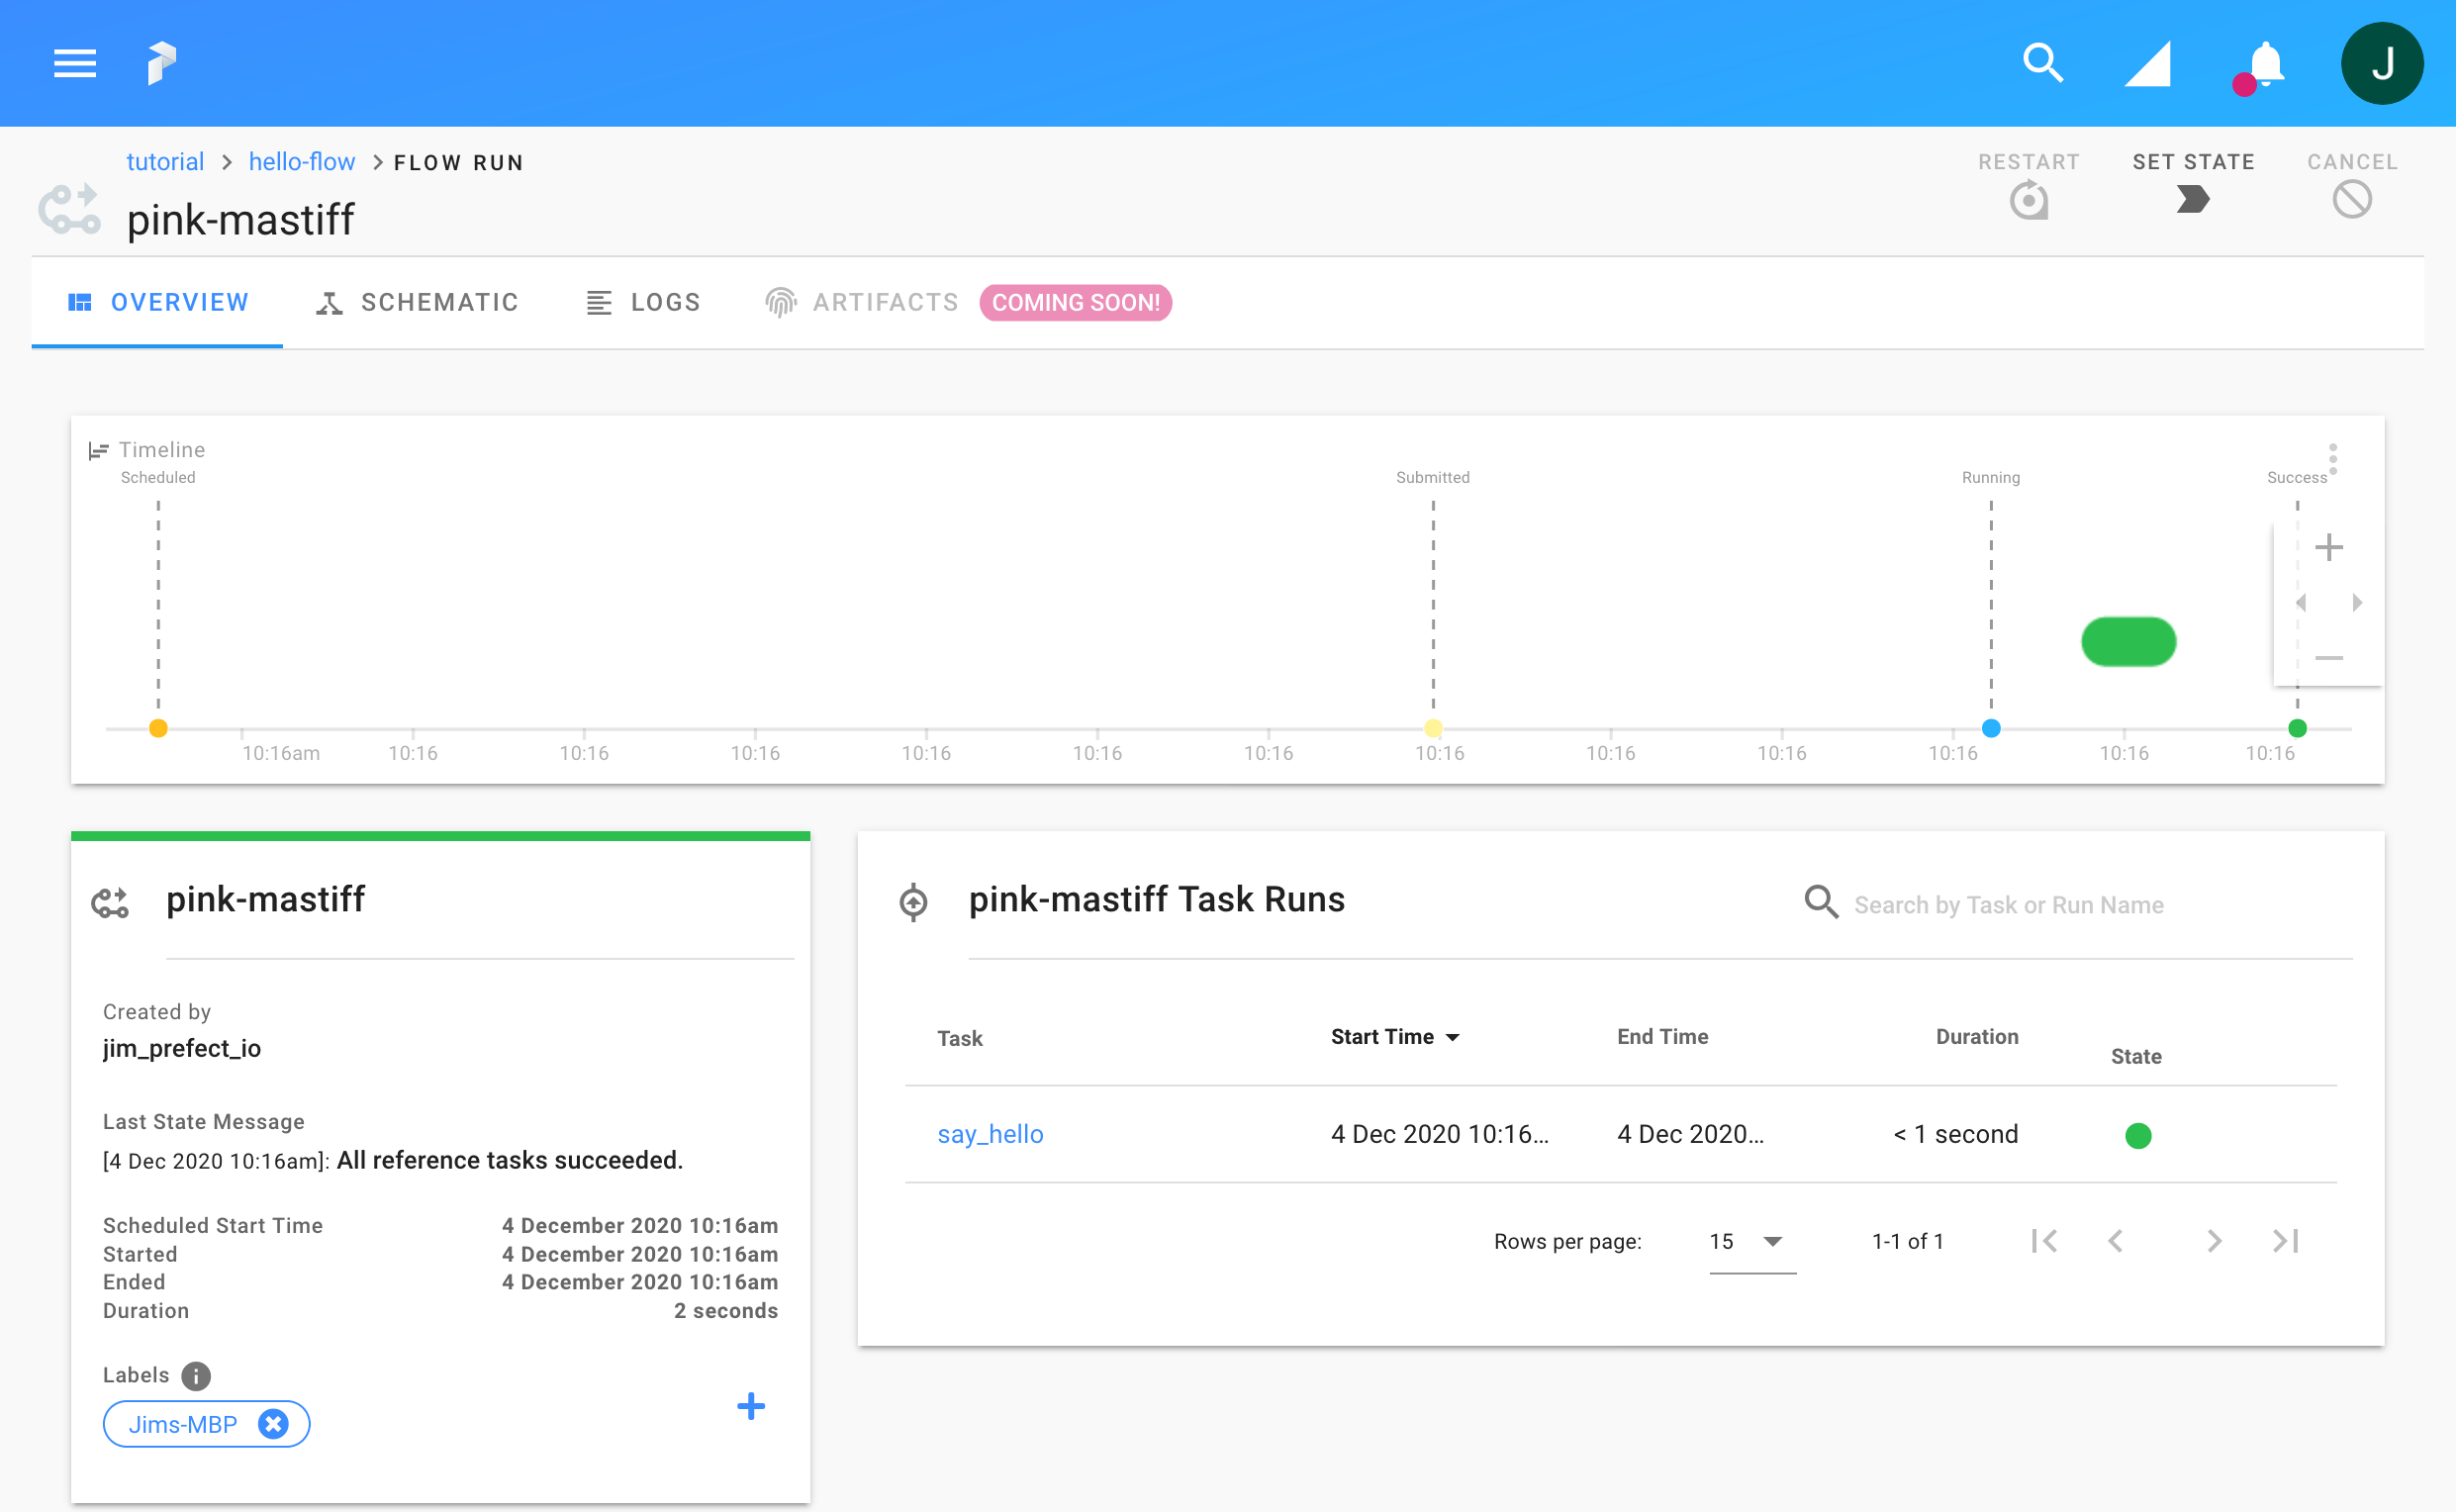
On the Flow page click Quick Run in the upper-right corner.
This takes you to a new page for the flow run. Here you can track activity for a specific flow run, view the state of individual tasks, and see flow run logs as they come in. For more details on the information presented here, see the Flow Run documentation.
Eventually the flow run should complete in a Success state, with all tasks in
green.
You've now executed your first flow run! In the next section we'll expand this flow to cover additional features.